KEEPING 3D SIMPLE
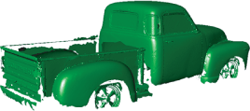
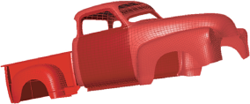
3D scanning, the process of converting physical objects into precise digital models, enables you to quickly and accurately capture your object’s shape and geometries. This process supplies you with a complete digital representation of your part to be used for reverse engineering, quality inspection or at any point of a typical manufacturing cycle.
Let 3D scanning empower you with:
- Rapid data capture
- Shortened production cycles
- Increased manufacturing efficiency
- Improved product quality
- CAD models that reflect shop-floor changes
DOES SIZE MATTER?
Not for 3D scanning! From cars, boats, aircraft, and buildings to turbine blades, dental implants, and mechanical parts, 3D scanning provides you with high quality digital models – no matter how big or small your part is. Scanning systems today are capable of scanning miniature figurines a mere 4mm high and can also scan a 240′ long jumbo jet – all with incredible accuracy and resolution.
We’re a “yes-we-can” company. Tell us your problem and we’ll do everything in our power to help you solve it. We are great project managers and are happy to perform large-scale service projects in addition to smaller projects. So whether you need simple STL data for 1 part, or class A surfaces of 500 parts, give us a call!
 3D scanning can help you:
- Measure parts
- Create CAD data
- Make parts fit
- Improve quality
- Rapid prototype
- Analyze the competition
- Scale parts up or down
- Save warehouse space
- Capture performance surfaces
WE ARE RESULTS ORIENTATED PROBLEM SOLVERS
We strive to deliver better than satisfactory results for every client we work with. The first step in gaining a happy client is setting the right expectations from the get-go, which is why we consult with every potential customer before a project is started. Once on board, we keep the communication lines open throughout your project to ensure our skilled engineers deliver the results you need – nothing more, nothing less.

SCAN DATA CHARACTERISTICS
3D scanning can be used in almost any engineering process and/or setting, and as a result there are many different ways that the data obtained can benefit you. While most customers require post-processing of 3D scan data, it is not necessary in some situations.
CHARACTERISTICS
- High resolution 3D surface information of physical part
- High accuracy measurements of +/- 0.002 inches (50 microns)
- Polymesh or point cloud data
- Digital copy of physical part
WHEN TO USE
- For further processing such as reverse engineering or quality inspection
- For rapid prototyping
- Computer Aided Engineering (CAE)
- Digital archiving
